
Repair synaptic cleft painting from understanding what causes those pesky chips to step-by-step solutions for every scenario. We’ll also answer the most common questions, share real-life tips, and help you avoid the mistakes that make paint repairs obvious. Ready to transform your walls? Let’s dive in.
What Is Synaptic Cleft Painting Damage?
Before we get our hands dirty, let’s clarify what we mean by “synaptic cleft painting.” In the world of wall finishes, this term refers to the tiny gaps, chips, or cracks that appear between layers of paint—often where two surfaces meet or where paint adhesion has failed. Think of it as the “gap” in your wall’s neural network, disrupting the smooth flow of color and texture.
Why Does Paint Chip or Crack?
Paint chips and cracks can happen for a bunch of reasons:
- Moisture: Water sneaking behind the paint can cause it to bubble and peel.
- Poor Surface Prep: Skipping primer or not cleaning the wall first? That’s a recipe for disaster.
- Aging Paint: Even the best paint jobs wear out over time.
- Physical Impact: Moving furniture, kids’ toys, or even a rogue vacuum can chip paint.
No matter the cause, the solution is within reach. Let’s explore how to fix chipped paint on wall surfaces, step by step.
How to Fix Chipped Paint on Wall: Step-by-Step
Assess the Damage
First, take a close look at the affected area. Is it a small chip, a deep gouge, or a long crack? The size and depth will determine your approach.
“I used to panic every time I saw a chip, but now I know it’s just a quick fix. The key is not to rush it.” — Home DIY enthusiast
Gather Your Tools
You’ll need:
- Putty knife or scraper
- Sandpaper (120–220 grit)
- Spackle or wall filler
- Primer
- Matching paint
- Small paintbrush or roller
- Damp cloth
Prep the Area
Start by gently scraping away any loose or flaking paint. Don’t dig too deep—just remove what’s already coming off. Wipe the area with a damp cloth to get rid of dust and debris.
Fill the Gap
Apply a thin layer of spackle or wall filler to the chipped area. Use your putty knife to smooth it out, feathering the edges so it blends with the surrounding wall. Let it dry completely (check the product label for drying times).
Sand Smooth
Once dry, lightly sand the area until it’s flush with the wall. Wipe away dust with a clean, damp cloth.
Prime the Spot
Don’t skip this step! Priming ensures the new paint sticks and prevents future chipping. Use a small brush to apply primer just to the repaired area.
Paint Over Chipped Paint
Now for the fun part: painting repair. Use a small brush or roller to apply your matching paint. Start with a thin coat, let it dry, then add another if needed. Blend the edges for a seamless finish.
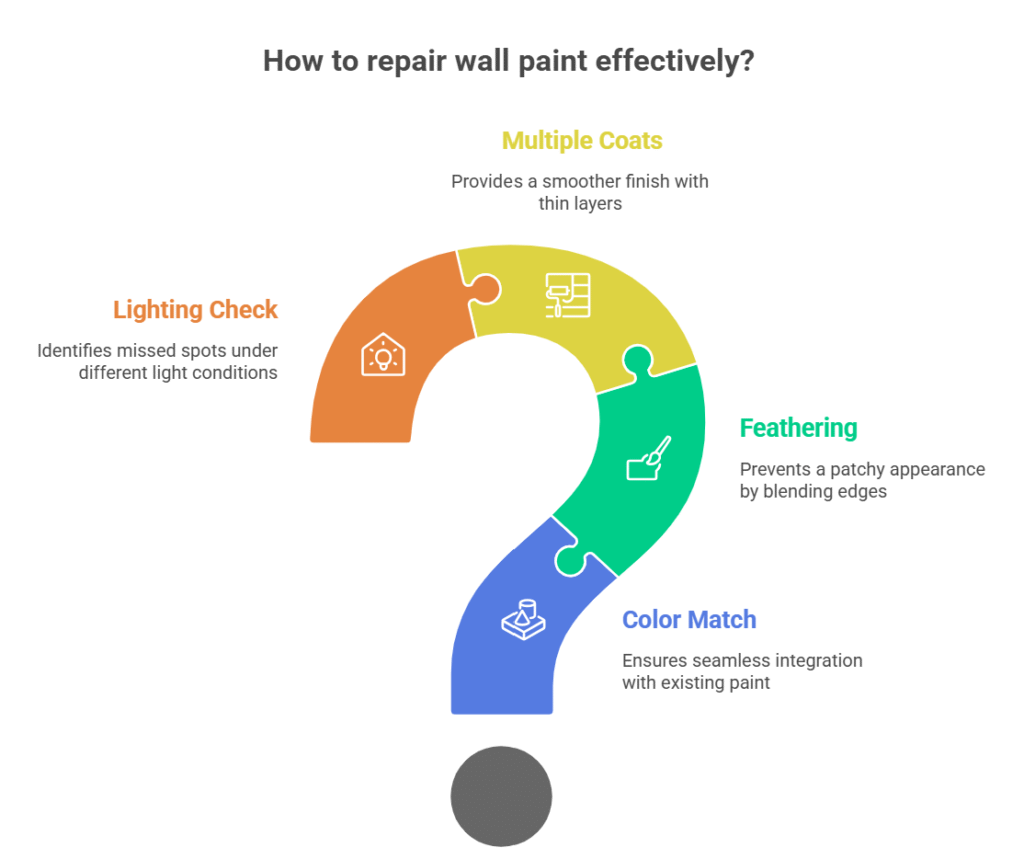
How to Fix Paint Chips on Wall: Pro Tips for a Flawless Finish
- Color Match: If you don’t have leftover paint, take a chip to the hardware store for a perfect match.
- Feathering: Always feather the edges of your repair to avoid a “patchy” look.
- Multiple Coats: Thin, even coats look better than one thick layer.
- Lighting: Check your work in different lighting to catch any missed spots.
Real-Life Example: From Disaster to Designer Wall
Last year, a friend of mine moved a heavy bookshelf and left a deep gouge in her living room wall. She texted me in a panic: “How do I fix this without repainting the whole room?” We followed the steps above—scraped, filled, sanded, primed, and painted. The result? You’d never know there was ever a problem.
Painting Repair: Common Mistakes to Avoid
Even seasoned DIYers make mistakes. Here’s what to watch out for:
- Skipping Primer: This leads to uneven color and more chips down the road.
- Overfilling: Too much spackle creates a bump that’s hard to sand flat.
- Rushing Dry Time: Patience pays off. Let each layer dry fully before moving on.
- Ignoring Texture: If your wall has a texture, match it before painting.
How to Paint Over Chipped Paint: Advanced Techniques
If you’re dealing with multiple chips or a large area, you might need to repaint an entire section. Here’s how:
Sand the Whole Area
Feather the edges of all chips so the surface is smooth.
Prime Generously
Prime the entire section, not just the chips, for even coverage.
Use a Roller
A small roller helps blend the new paint with the old, especially on larger patches.
Blend the Edges
While the paint is still wet, lightly roll over the edges to blend with the surrounding wall.
The Science Behind Paint Adhesion (2025 Update)
Paint technology has come a long way. Modern primers and paints are designed to bond better, resist moisture and flex with your walls. But even the best products need proper prep. In 2025, eco-friendly and low-VOC paints are the norm, making repairs safer for your family and the planet.
Pros and Cons of DIY Painting Repair
Pros
- Cost-Effective: Save money by fixing chips yourself.
- Satisfying: There’s nothing like seeing a flawless wall you repaired.
- Customizable: Match your exact paint color and finish.
Cons
- Time-Consuming: Each step takes time, especially drying.
- Skill Required: Rushing or skipping steps can make repairs obvious.
- Color Matching: Old paint can fade, making matching tricky.
Features of a Professional-Grade Repair
- Invisible Patch: No visible lines or bumps.
- Durable Finish: Resists future chips and cracks.
- Color Consistency: Seamless blend with existing paint.
Usability in 2025: What’s Changed?
With smart home devices and better paint formulas, wall repairs are easier than ever. Apps can now scan your wall and suggest the exact paint match. Some even guide you through each step with AR overlays. But the basics—prep, fill, sand, prime, paint—remain the same.
FAQs
Q. How do you fix chipped paint on a wall without repainting the whole thing?
A. You can fix small chips by cleaning the area, filling with spackle, sanding smooth, priming, and touching up with matching paint. No need to repaint the entire wall if you blend carefully.
Q. What’s the best way to repair paint chips on a wall?
A. The best method is to scrape away loose paint, fill the chip, sand smooth, prime, and paint. For larger areas, feather the edges and use a roller for blending.
Q. Can you paint over chipped paint directly?
A. It’s not recommended. Painting over chipped paint without proper prep can lead to more peeling. Always remove loose paint, fill, sand, and prime first.
Q. How do you match paint color for touch-ups?
A. If you don’t have leftover paint, take a chip to your local hardware store for a color match. Many stores use digital scanners for a perfect match.
Risks and How to Avoid Them
- Mismatched Paint: Always test your color in a small, hidden spot first.
- Poor Adhesion: Don’t skip primer, especially on repaired areas.
- Visible Patches: Feather edges and use thin coats for best results.
Final Thoughts
A flawless wall isn’t just about looks—it’s about protecting your home and keeping it feeling fresh. With the right approach, anyone can master painting repair and fix chipped paint on wall surfaces like a pro. Whether you’re prepping for a big event or just want to enjoy your space, these tips will help you get there.
CLICK HERE FOR MORE BLOG POSTS
John Authers is a seasoned and respected writer whose work reflects the tone, clarity, and emotional intelligence that readers value in 2025. His writing blends deep insight with a natural, human voice—making complex ideas feel relatable and engaging. Every piece he crafts feels thoughtful, original, and genuinely worth reading.