
bike drawing seems so tricky? You’re not alone. Whether you’re a beginner doodler, a parent helping with homework, or an aspiring artist looking to master perspective, drawing a bike can feel intimidating. The wheels, the frame, the details—where do you even start? In this comprehensive guide, we’ll break down the art of bike drawing, from simple bicycle sketches to advanced motorcycle drawing, and even how to draw a dirt bike with confidence.
By the end, you’ll not only know how to draw a bike step by step, but you’ll also discover tips, real-life examples, and creative ideas to make your bike drawings stand out. Ready to roll? Let’s dive in!
Why Bike Drawing Is a Must-Learn Skill for Artists
Bike drawing isn’t just about capturing a mode of transport—it’s a fantastic exercise in observation, proportion, and perspective. Mastering a bicycle drawing or a motorcycle sketch can boost your confidence and open doors to more complex subjects, from vehicles to urban scenes.
But here’s the thing: most people overcomplicate it. The secret? Break it down into simple shapes, understand the structure, and practice regularly. As one artist shared, “My first bike drawing looked like a spaghetti mess, but after a few tries, I started seeing the beauty in the lines and circles. Now, bikes are my favorite thing to sketch!”
The Basics: Understanding the Anatomy of a Bike
Before you start your bike drawing, it helps to know what you’re looking at. Whether it’s a classic bicycle drawing or a sleek motorcycle drawing, most bikes share the same basic parts:
- Wheels: Two circles, usually the same size.
- Frame: The “skeleton” connecting the wheels.
- Handlebars: Where the rider steers.
- Seat: Where the rider sits.
- Pedals (for bicycles): Where the rider’s feet go.
- Engine (for motorcycles): The heart of the machine.
Understanding these elements makes it easier to break down the drawing process, no matter what style you’re aiming for.
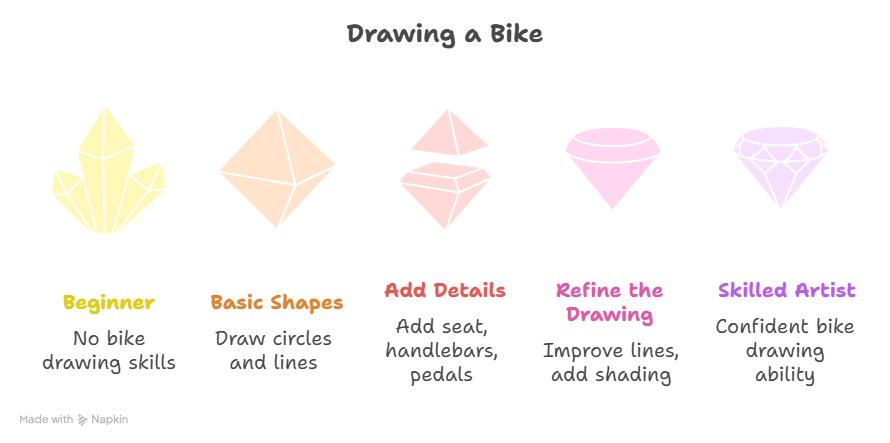
How to Draw a Bike: Step-by-Step for Beginners
Let’s start with a simple bicycle drawing. Grab a pencil, eraser, and some paper. Ready? Here’s how to draw a bike in easy steps:
Step 1: Draw the Wheels
Start with two circles, spaced apart. Use a light hand so you can adjust as needed. These are your bike’s wheels.
Step 2: Connect the Wheels with the Frame
Draw a straight line from the center of the back wheel to the center of the front wheel. This is the main bar of the frame. Add a diagonal line from the back wheel up to where the seat will be, and another from the front wheel up to where the handlebars will go.
Step 3: Add the Seat and Handlebars
Sketch a small rectangle or oval above the back wheel for the seat. For the handlebars, draw a short vertical line above the front wheel, then add a horizontal line for the handles.
Step 4: Draw the Pedals and Chain
Add a small circle in the middle of the frame (where the two main bars cross). Draw two lines out from this circle for the pedals, and a thin oval for the chain.
Step 5: Refine the Details
Erase any unnecessary lines. Add spokes to the wheels, thicken the frame, and add any extra details you like—reflectors, a basket, or even a bell.
Step 6: Ink and Color (Optional)
Go over your final lines with a pen or marker. Once the ink is dry, erase the pencil lines and add color if you wish.
Pro Tip:
Don’t stress about perfection. Every bike drawing is unique, and practice makes progress!
Bicycle Drawing: Creative Ideas and Variations
Once you’ve mastered the basics, try these fun twists on your bicycle drawing:
- Vintage Bicycle: Add a big front wheel and a tiny back wheel for a “penny-farthing” look.
- Mountain Bike: Thicker tires, a sturdier frame, and maybe some mud splatters.
- Cartoon Bike: Exaggerate the wheels or frame for a playful style.
- Bike in Motion: Add speed lines or a rider to show movement.
Motorcycle Drawing: From Simple Sketches to Realistic Renders
Ready to level up? Let’s talk motorcycle drawing. Motorcycles are a bit more complex, but the process is similar—start with basic shapes and build up the details.
How to Draw a Motor Bike: Step-by-Step
- Wheels: Draw two circles, just like with a bicycle.
- Frame: Connect the wheels with a strong, angular frame.
- Engine: Sketch a boxy or oval shape between the wheels for the engine.
- Seat and Handlebars: Add a seat above the back wheel and handlebars above the front.
- Details: Add exhaust pipes, headlights, mirrors, and any unique features.
- Refine: Clean up your lines, add shading, and bring your motorcycle to life.
User Quote:
“I used to think motorcycle drawing was impossible, but breaking it down into shapes made it so much easier. Now I can draw a motor bike from memory!”
Dirt Bike Drawing: Capturing Action and Attitude
Dirt bikes are all about energy and excitement. When you’re working on a dirt bike drawing, focus on the rugged tires, high suspension, and dynamic angles.
Tips for Drawing a Dirt Bike
- Tires: Make them chunky with deep treads.
- Suspension: Show the shocks and springs for that off-road look.
- Pose: Tilt the bike or add a rider in mid-jump for extra drama.
- Details: Don’t forget the number plate, mud splashes, and protective gear.
Advanced Bike Drawing: Perspective, Shading, and Realism
Once you’re comfortable with basic bike drawing, challenge yourself with more advanced techniques:
Perspective
Try drawing a bike from different angles—front, side, or even a three-quarter view. Use vanishing points to keep proportions accurate.
Shading
Add shadows and highlights to give your bike drawing depth. Notice where the light hits the frame and wheels.
Textures
Use cross-hatching or stippling to show metal, rubber, or leather.
Backgrounds
Place your bike in a scene—a city street, a mountain trail, or a racetrack.
Digital Bike Drawing: Tools and Trends in 2025
Digital art is more accessible than ever. If you’re interested in digital bike drawing, try these tools:
- Procreate (iPad): Great for sketching and coloring.
- Adobe Fresco: Excellent for vector and raster art.
- Clip Studio Paint: Popular with illustrators and comic artists.
Digital drawing lets you experiment with layers, undo mistakes, and add effects like motion blur or lighting.
Common Mistakes in Bike Drawing (And How to Fix Them)
Wheels Not Aligned
Use a ruler or digital guide to keep wheels parallel and the same size.
Frame Proportions Off
Study real bikes or reference photos to understand how the frame connects the wheels.
Overcomplicating Details
Start simple. Add details gradually as your confidence grows.
Ignoring Perspective
Practice drawing bikes from different angles to improve your spatial understanding.
Sample Bike Drawing: Step-by-Step Visual Guide
Let’s walk through a quick sample rough draft for a bike drawing:
- Draw two circles for wheels.
- Connect with a triangle for the frame.
- Add a line for the seat and handlebars.
- Sketch in pedals, chain, and spokes.
- Refine the frame, erase guidelines, and add details.
This roughdraft approach helps you build confidence and see the structure before getting lost in details.
The Meaning of Rough Draft in Art
In drawing, a rough draft is your first, loose sketch. It’s where you plan the composition, test ideas, and make mistakes. Don’t skip this step! Even professional artists start with a rough draft before refining their work.
Real-Life Example: From Rough Draft to Finished Bike Drawing
One art student shared, “My first roughdraft of a bicycle looked like a wobbly mess, but I kept tweaking the shapes and lines. By the third try, I had a bike that actually looked real! The process taught me patience and the value of starting rough.”
How to Draw a Bike for Kids: Simple and Fun
If you’re teaching kids how to draw a bike, keep it playful:
- Use big, bold shapes.
- Let them color the bike any way they like.
- Encourage creativity—add streamers, baskets, or even rocket boosters!
Drawing bikes helps kids develop hand-eye coordination and spatial awareness.
How to Draw a Bike for Beginners: Quick Tips
- Start with circles: Wheels are the foundation.
- Use light lines: Easy to erase and adjust.
- Break it down: Frame, seat, handlebars, pedals.
- Practice: The more you draw, the better you’ll get.
How to Draw a Motor Bike: Step-by-Step for Beginners
- Draw two circles for wheels.
- Connect with a strong, angular frame.
- Add a box for the engine.
- Sketch the seat and handlebars.
- Add details like headlights, exhaust, and mirrors.
- Refine and shade for realism.
How to Draw a Dirt Bike: Capture the Adventure
- Start with the wheels and frame.
- Add chunky tires and high suspension.
- Tilt the bike for a sense of motion.
- Add mud splashes and a rider for action.
Bicycle Drawing vs. Motorcycle Drawing: What’s the Difference?
- Bicycle drawing: Focuses on pedals, chain, and a lighter frame.
- Motorcycle drawing: Includes an engine, exhaust, and more complex details.
- Dirt bike drawing: Emphasizes rugged tires and suspension.
Each type of bike drawing has its own challenges and rewards.
Risks and Rewards: The Pros and Cons of Bike Drawing
Pros
- Improves observation and proportion skills.
- Teaches perspective and structure.
- Fun and rewarding to master.
Cons
- Can be frustrating at first.
- Wheels and frames are tricky to align.
- Requires patience and practice.
Expert Tip:
Don’t give up! Every artist struggles with the roughest drafts. Keep practicing, and you’ll see progress.
FAQs
1. How do I start a bike drawing if I’m a complete beginner?
Begin with two circles for the wheels, then connect them with simple lines for the frame. Add the seat, handlebars, and pedals. Start simple and add details as you go.
2. What’s the difference between a bicycle drawing and a motorcycle drawing?
A bicycle drawing focuses on pedals, a chain, and a lightweight frame, while a motorcycle drawing includes an engine, exhaust pipes, and more complex details.
3. How can I draw a dirt bike that looks realistic?
Focus on the chunky tires, high suspension, and dynamic angles. Add mud splashes and a rider in action for extra realism.
4. What’s the best way to practice bike drawing?
Use reference photos, break the bike into basic shapes, and draw from different angles. Don’t be afraid to make rough drafts and refine them over time.
Final Thoughts
Bike drawing is more than just a technical exercise—it’s a creative journey that builds your skills and confidence. Whether you’re sketching a simple bicycle, a roaring motorcycle, or a dirt bike in mid-jump, every drawing teaches you something new.
CLICK HERE FOR MORE BLOG POSTS
Liam is a freelance writer, blogger, and digital media journalist. He has a management degree in Supply Chain & Operations Management and Marketing and boasts a wide-ranging background in digital media.